 | |
| Why do pugs always look so sad? |
This adorable card comes courtesy of me via Martha Stewart via children's book author Matthew Van Fleet. Van Fleet is the king of movable paper animals, and his books are adorable. I am already planning on buying Moo for my "future children."
Martha featured three dog breed options, but for me it was never a choice. Once you go pug you never go back.
After some careful instruction-following, and "liberating" three brads (is that how you spell it? Martha calls them "paper fasteners") from bottom of the supply closet at work, I was left with a quasi-movable pug head (note that if you pull that tab with the blue arrow on the right, the pug's head moves! It really does! I swear).
This almost inspires me to start sending more cards the old fashioned way. Now, to buy some stamps.
Brace yourself for a ton of instructions coming your way. I suggest you watch the video as I couldn't get anywhere without it. As always, huge props to my girl Martha as this is all her and Van Fleet's invention.
You can find everything, and more, here: http://www.marthastewart.com/264959/mechanical-dog-cards
Tools and MaterialsTemplates: Top of card ("Hap-pee Birthday," head shaking, or blank), middle (mechanical) pieces, bottom of card, Assembly guide, Printer, Cardstock, Photo of dog (optional), Scissors, Craft knife
Paste, Ruler, Bone folder, Screw punch, Double-sided tape, Paper fasteners, Regular (one-sided) tape
Instructions1. Print templates for each of the 3 layers of the card -- top of card, middle (mechanics), and bottom -- and assembly instructions on card stock. To make a card featuring your own dog, print out the blank template and cut out and paste a photo of your dog that's about the same size and pose.
2. Starting with the bottom of the card, use a ruler and a bone folder to score along the dotted lines. Cut out the full piece on the solid lines. Punch the hole marked by a black dot with a screw punch. Fold up along the dotted lines along both edges.
3. Cut out the middle (mechanical) pieces on solid black lines. Score on dotted lines where marked. Punch holes where marked with a screw punch.
4. Attach folded pink "stop" piece to bottom of card with double-sided tape, as shown in the template.
 |
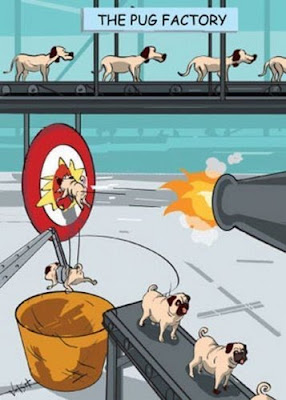
| The pug factory. Or the answer to why pugs look silly. |
- Attach the yellow tab arm to the pull tab at point "A."
- Attach the green tab arm to the yellow tab arm at point "B."
- Attach the green tab arm to the bottom card piece at point "C."
7. Cut out the top piece for the card, and cut out circle as marked. Lay the assembled bottom piece flat, fold the two long flaps in over the pull tab, and put double-sided tape along the two long flaps.
8. Lay the top edge of the front of the card over the tape on the top flap of the bottom of the card; press in place. Pull the leg/head flanges through the hole in the front of the card.
9. Attach the bottom edge of the front of card to the bottom flap.
10. Place a piece of tape on the back of each of the leg/head flanges so that sticky side extends past the flanges, facing up. With the pull tab pushed in, position the leg/head over the flanges (leg should cover the word "peee"). Press down firmly so the tape holds leg/head in place. Cut off excess tape with a craft knife.
11. Attach stand to back of card with double-sided tape.